Choose and Use Cooking Color Icons the Right Way
Visual communication depends heavily on the small elements that carry meaning quickly. Cooking color icons are among the most practical assets for anyone building food-related content—whether you are designing a recipe app, putting together a restaurant menu, creating social media posts, or assembling an instructional infographic. These icons represent ingredients, utensils, actions, and kitchen tools in a way that text alone cannot match. When chosen and applied correctly, they make your work look polished, professional, and easy to understand.
But the difference between icons that elevate a project and icons that drag it down often comes down to a few avoidable mistakes. Many people pick the first set they find, apply them without modification, and wonder why the result feels off. The good news is that with a little planning and the right file formats, you can avoid those outcomes entirely.
What Cooking Color Icons Actually Offer
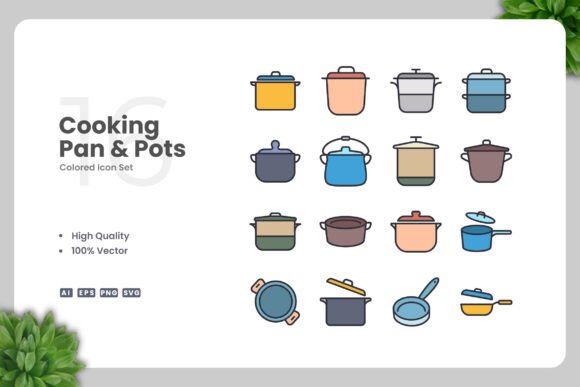
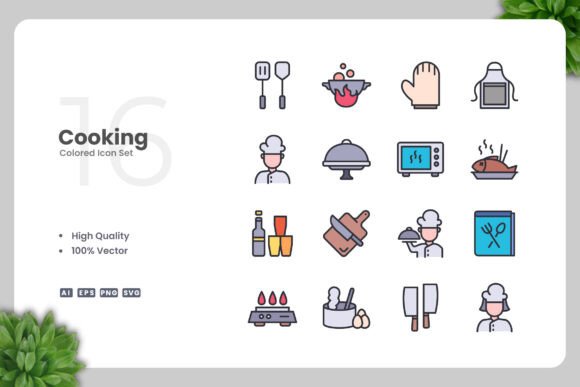
A well-made cooking icon set provides consistent visual language for everything from a whisk and a frying pan to a chef's hat and a timer. Because these icons come in color, they add energy and clarity to layouts without requiring additional styling. The best sets are built as vectors, which means you can resize them from a tiny mobile button to a large poster without losing sharpness. They also allow full color control, so you can match them to your brand palette or adapt them for different backgrounds.
When you download a professional set, you typically receive multiple file formats: AI, EPS, SVG, and PNG. Each format serves a different purpose. SVG files work directly on websites and apps. AI and EPS files let you open and edit the icons in vector software like Adobe Illustrator or CorelDRAW. PNG files with transparency are ready for quick use in presentations, flyers, or social media. A readme file usually explains the contents, which saves time when you are in a hurry.
Mistake One: Choosing the Wrong File Format for Your Task
This is the most common error. People grab a PNG because it appears ready to use, then try to scale it up for a banner and end up with blurry edges. Or they download an SVG but do not realize they can edit the colors directly in a code editor or vector program. The result is wasted time and a final product that looks unprofessional.
Before you start any project, decide where the icons will appear. If you are building a website or a mobile interface, SVG is your best option because it scales perfectly and keeps file size small. If you are producing print materials like flyers or posters, use AI or EPS so you can adjust colors and sizes without degradation. For quick social media posts or internal documents, PNG with transparency works fine—just make sure the resolution matches your output size.
Do not assume one format fits every use. Check the deliverables in the icon set you are considering. A set that includes AI, EPS, SVG, and PNG gives you flexibility across platforms. If a seller only offers one format, think carefully about whether it matches your typical workflow.
Mistake Two: Keeping the Default Colors Without Question
Color icons arrive with predefined palettes. Those colors may look pleasant on the product preview, but they rarely match your brand identity or the specific mood you need. Using them as-is can make your design feel disconnected from the rest of your content. A bright orange saucepan might clash with your muted earthy tones. A neon green mixing bowl could distract from the information it is supposed to support.
The icons in a vector set are fully customizable. Open the AI or EPS file in Adobe Illustrator or CorelDRAW, select any icon, and change its fill color to match your palette. If you are using SVG, you can edit the color directly in the code or in a vector editor. This takes only a few minutes and makes a dramatic difference in how cohesive your final design looks.
One practical approach is to import the entire icon set into a single document, apply your brand colors to all the icons at once using global swatches, and then export the versions you need. This keeps everything consistent and saves time later.
Mistake Three: Overlooking Scalability and Line Consistency
Even within a single set, icons can behave differently when scaled. Some may have very thin lines that become invisible at small sizes. Others may have dense details that turn into blobs when reduced. This is especially important for mobile apps and small UI elements where every pixel counts.
Vector icons solve the scaling problem technically, but the design quality still matters. A good set uses consistent stroke weights and balanced proportions across all icons. Before you commit to a set, preview several icons at both very small and very large sizes. If the thinnest lines disappear or the shapes become unrecognizable, look for a set with simpler, more robust geometry.
If you already own a set with inconsistent line weights, you can edit the strokes in your vector software. Select the icons, unify the stroke thickness, and adjust any details that lose clarity. This takes extra time but can salvage a set that otherwise fits your theme perfectly.
Mistake Four: Ignoring Readability and Context
Icons communicate through visual shorthand. A fork and knife symbol is widely understood to mean "dining" or "food." But more specific icons—like a mandoline slicer or a spiralizer—may not be familiar to all audiences. If your project targets home cooks who may not own specialized tools, those icons could cause confusion rather than clarity.
Consider your audience before selecting icons. For a general recipe app, stick with familiar symbols: pots, pans, knives, measuring cups, and oven mitts. For a professional cooking school or a chef's toolkit, you can include more specialized equipment. When in doubt, add a short text label underneath or beside the icon. This does not weaken the design—it strengthens comprehension.
Also pay attention to cultural differences. A stovetop icon that looks like a gas range may not represent induction cooktops or electric burners well. A rolling pin may not be common in every cuisine. Choose icons that reflect the actual tools your audience uses.
Mistake Five: Neglecting the Vector Editing Process Altogether
Some people skip editing because they assume it is complicated or time-consuming. They drag a PNG into their design and call it done. That approach limits what you can achieve. When you avoid the vector workflow, you cannot easily recolor, resize without quality loss, or combine icons into custom illustrations.
Learning the basics of vector editing is worth the effort. Adobe Illustrator and CorelDRAW both have gentle learning curves for tasks like changing colors, scaling, and grouping objects. You do not need to be a professional illustrator. You just need to open the file, select the icon, and apply your changes. Most icon sets include organized layers and clearly named objects, which makes the process even simpler.
If you do not own vector software, free alternatives like Inkscape or Vectr can open SVG files and allow similar edits. The key is to treat the icons as raw material that you shape to your needs, not as finished pieces that you place as-is.
What to Check Before You Download or Buy
Not all icon sets are created equal. Before you purchase or download a set, verify a few details that directly affect your workflow and final quality.
- File types included. Look for AI, EPS, SVG, and PNG at minimum. Bonus if the set includes individual files for each icon as well as a combined file.
- Number of icons. Count how many unique icons you get. A set of 30 well-designed icons is often more useful than 100 sloppy ones.
- Color variation. Check whether the set offers the icons in multiple color versions or just one fixed palette. Full editability is better than presets.
- Organization. Icons that are neatly named and grouped save hours of searching later. Look for a readme file or a folder structure that makes sense.
- License terms. Confirm that you can use the icons in commercial projects, especially if you are designing for clients or selling products.
- Preview quality. Study the preview images carefully. Zoom in to see if lines are clean and shapes are well proportioned.
Taking ten minutes to check these points upfront prevents frustration and rework. It also ensures that the icons you choose will serve you across multiple projects, not just the one you are working on now.
Building Your Icon Workflow for Long-Term Use
Once you have a reliable cooking color icon set, create a simple system for using it repeatedly. Store the master vector file in a dedicated folder on your drive or cloud storage. Keep the PNG exports in a separate folder organized by size or color. When you start a new project, open the master file, duplicate the icons you need, and customize them for that specific context. This approach keeps your original set untouched and ready for the next job.
If you design for multiple clients or brands, duplicate the master file and apply each client's color palette to their copy. That way you never have to rebuild your icon library from scratch. Over time, this habit saves hours and ensures consistent branding across every piece of content you produce.
Final Thoughts on Getting the Most from Color Icons
Cooking color icons are a straightforward asset, but their value depends entirely on how you prepare and apply them. Choosing the right file format, customizing colors to fit your brand, checking scalability, considering your audience, and embracing basic vector editing all contribute to a professional result. Skipping these steps leads to mismatched visuals, wasted time, and a final product that does not communicate as clearly as it could.
The next time you need cooking icons for a website, app, social media graphic, flyer, poster, or infographic, treat them as a flexible resource rather than a fixed element. Open the vector file, make the adjustments your project deserves, and export the specific formats you need. That small investment in preparation will show up in every piece of content you create.